
‘Why can’t I hold a handstand?’
For a lot of practitioners holding a handstand feels impossible and often like luck if they manage to stay up for a few seconds. In this post I’ll give an overview of why you may be losing balance and how you can create balance in your handstands.
For the purposes of this post I am going to concentrate on the straight handstand as in my opinion this is the first you should try to master. Tuck handstands and a straddle in some ways are easier but once you master the straight, the other variations will be easier to practice. The straight handstand is your base.
One of the main reasons I see students struggle with a handstand is that they are not using thier hands correctly and are resting on thier hands, rather than what they should be doing is pressing down into the earth to generate lift. To go up you must push down and your hands are the stable connection you need to balance.
You need a solid foundation for all arm balances
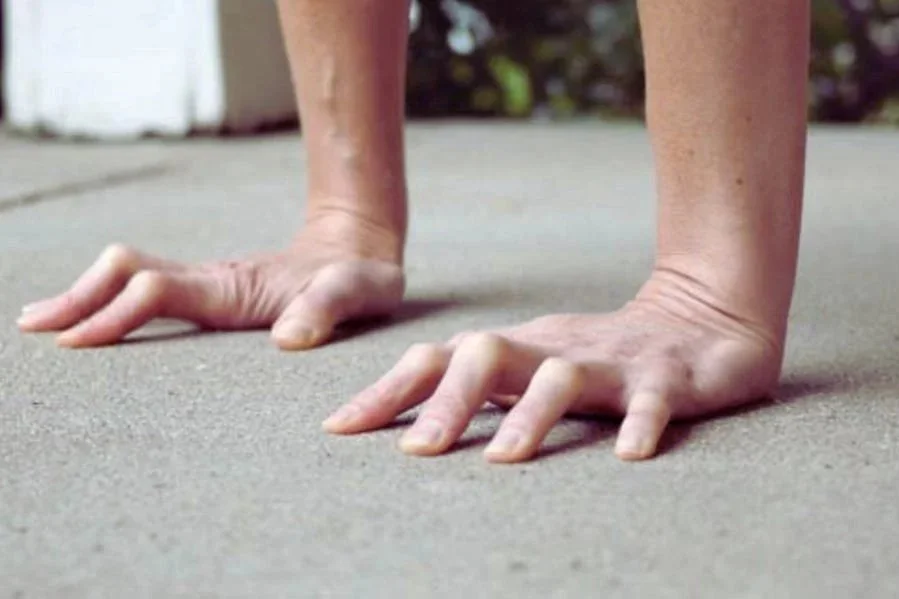
All of the main knuckles of your 4 fingers should be pressing down strongly into the ground. At no point should they lift.
All of the tips of your fingers and thumbs should be pressing down and strongly gripping the ground. They should be white to look at from the effort.
You can lift the middle knuckle of your fingers as shown in the image above ( spider grip ), but this is only done as a result of the amount of grip you are applying.
The above bullet points are essential and cannot be stressed enough. If you lose this connection, or a knuckle lifts, you will lose balance. For example, if I have been doing many handstands for a long period, my forearm flexors will get pumped and fatigued. This is how much you should be gripping and pushing with your hands. Not resting.
Let’s look at the shoulders
I say shoulders, but the shoulders action in a handstand is mostly for stability. This is essential but the main muscles that we are using in a handstand are the latissimus dorsi, serratus anterior and the trapezius muscle.

Lats
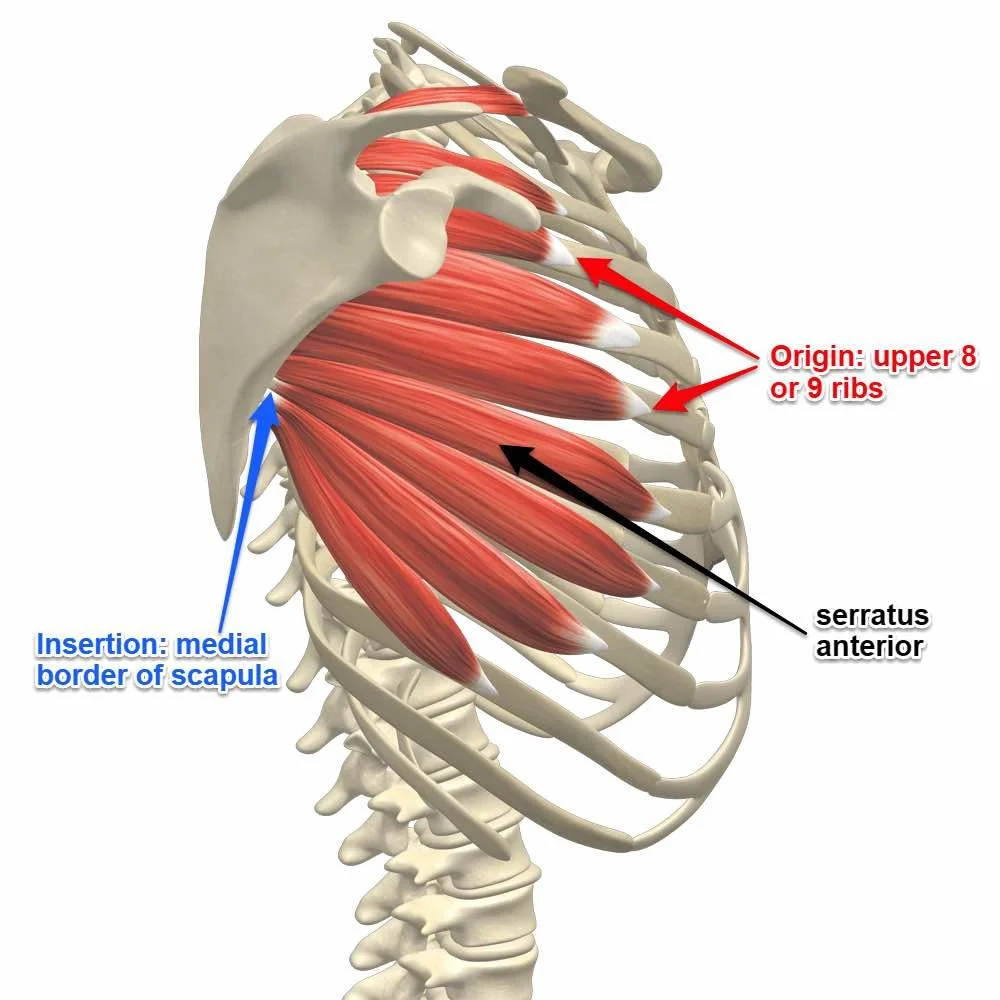
Serratus Anterior

Trapezius
The combination of these muscles working together is what generates the force you need to push down into the earth to create stability and balance of the shoulder girdle.
One thing to note is the potential overuse of the trapezius in arm balances which you want to avoid as this muscle tends to compensate for underactivation of the other two.
Now, what you need for a stable handstand is an elevated scapula ( shoulder ), and an inward rotation of the arms. You can outwardly rotate the arms ( This is necessary in back bending handstands such as Vrschikasana B ), but for most handstands you will find more stability inwardly rotating. This action is done by pressing down firmly on the index finger knuckle, and the inside of your elbows facing each other. Elbows spinning in.

Elevated scapula
This can be tricky for yoga practitioners to understand as it’s the opposite of what you are told in class to do. For example in down dog you would do the opposite.

Depressed scapula
In down dog we depress the scapula ( shoulders move down and away from the ears ) and we slightly outwardly rotate the arms ( think of activating the lats and the elbows will naturally turn out and down.
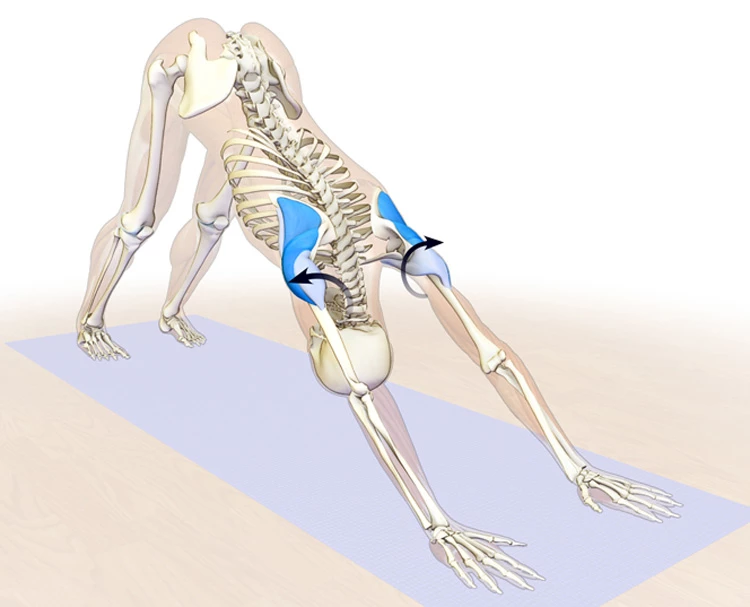
Depressed scapula with external rotation.
So in a straight handstand we are straightenting the arms fully and bringing our arms up by our ears. Elevating the scapula.
These are the most common reasons I see people struggling with holding a handstand.
This presssing down strongly with the muscles shown above and the elevation of the scapula is what creates stability. Along with the stability of the shoulders we actively use the fingers to control the balance of our body. Without these you will lose balance.
The easiest way to balance in a handstand is when the bones of your body are stacked as best as they can in a straight line.
The straighter your body is the easier it will be to balance and the less strength you will need. For this we need open shoulders.
Good shoulder flexion helps in our handstands. When you bring your arm up by your ear, this should be relatively easy without restrictions.
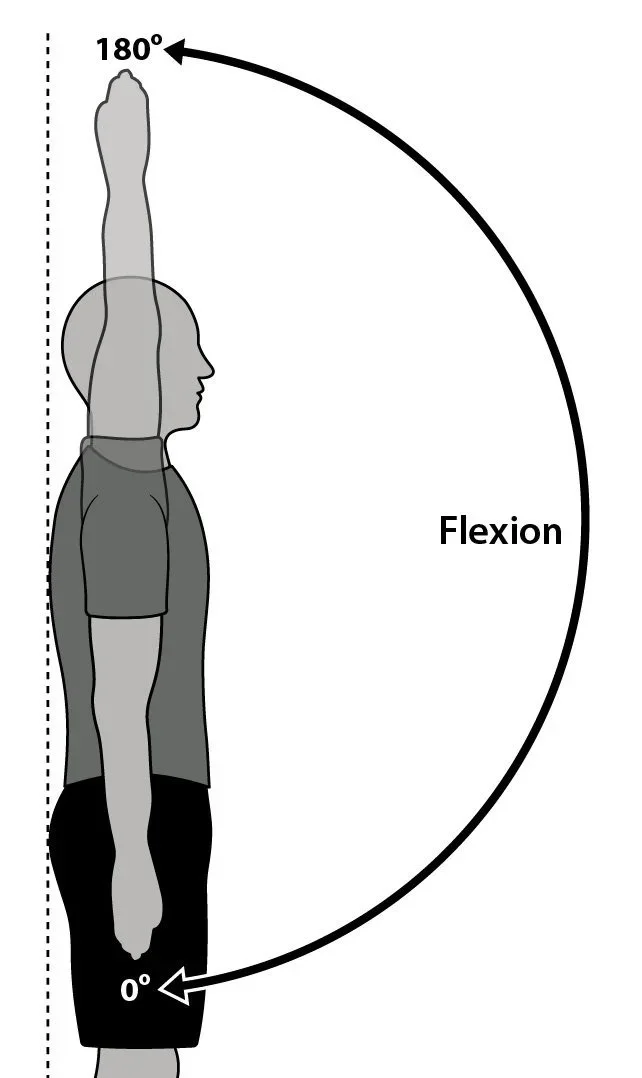
Shoulder flexion
If your ribs flare out when you bring your arm up by your ears and you go into a back bend then you know you need to work on opening your shoulders more.
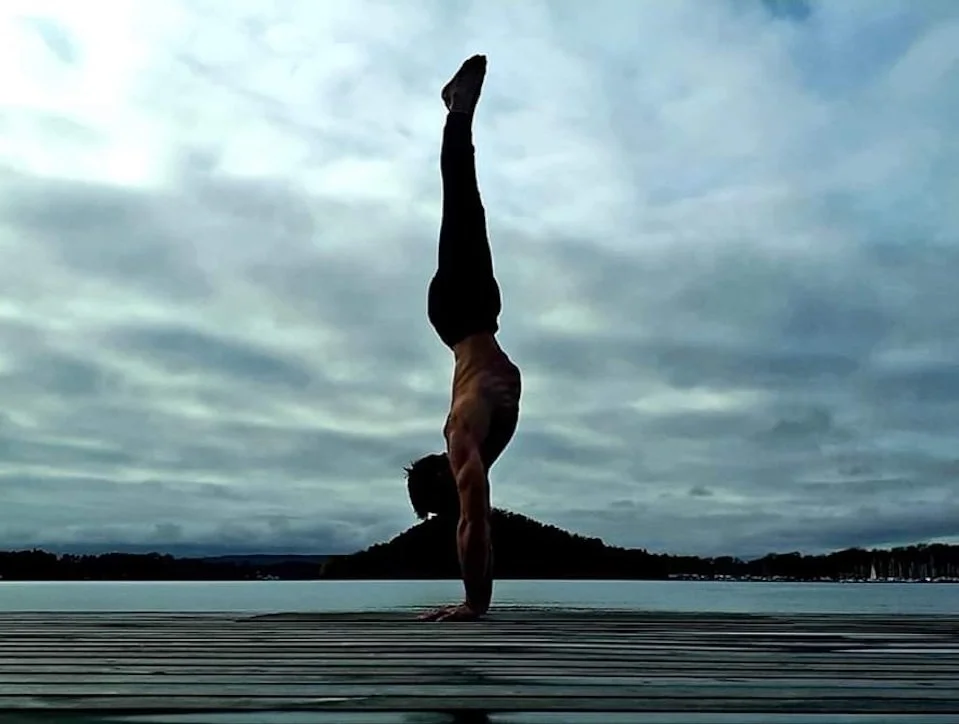
Straight handstand
In my opinion these are the most crucial factors to focus on when looking for control in your handstand. When these are embodied you will move from finding balance as a result of it feeling like luck to creating balance with a strong sense of control coming from the ground up through your fingers.
A simple and very effective instruction to start working on your straight handstand is to use a wall.
Start close to the wall and kick up to the wall. Now keep one foot on the wall and the other inline with your body. Try to keep your body as straight as you can by keeping the rib cage in ( not flared out ) and work on pressing into the floor with the correct use of the muscles described above. You want your focus to be on your fingers mostly and activating the big muscles in your back. The lats. Press into the floor as if you are trying to push the floor away from you.
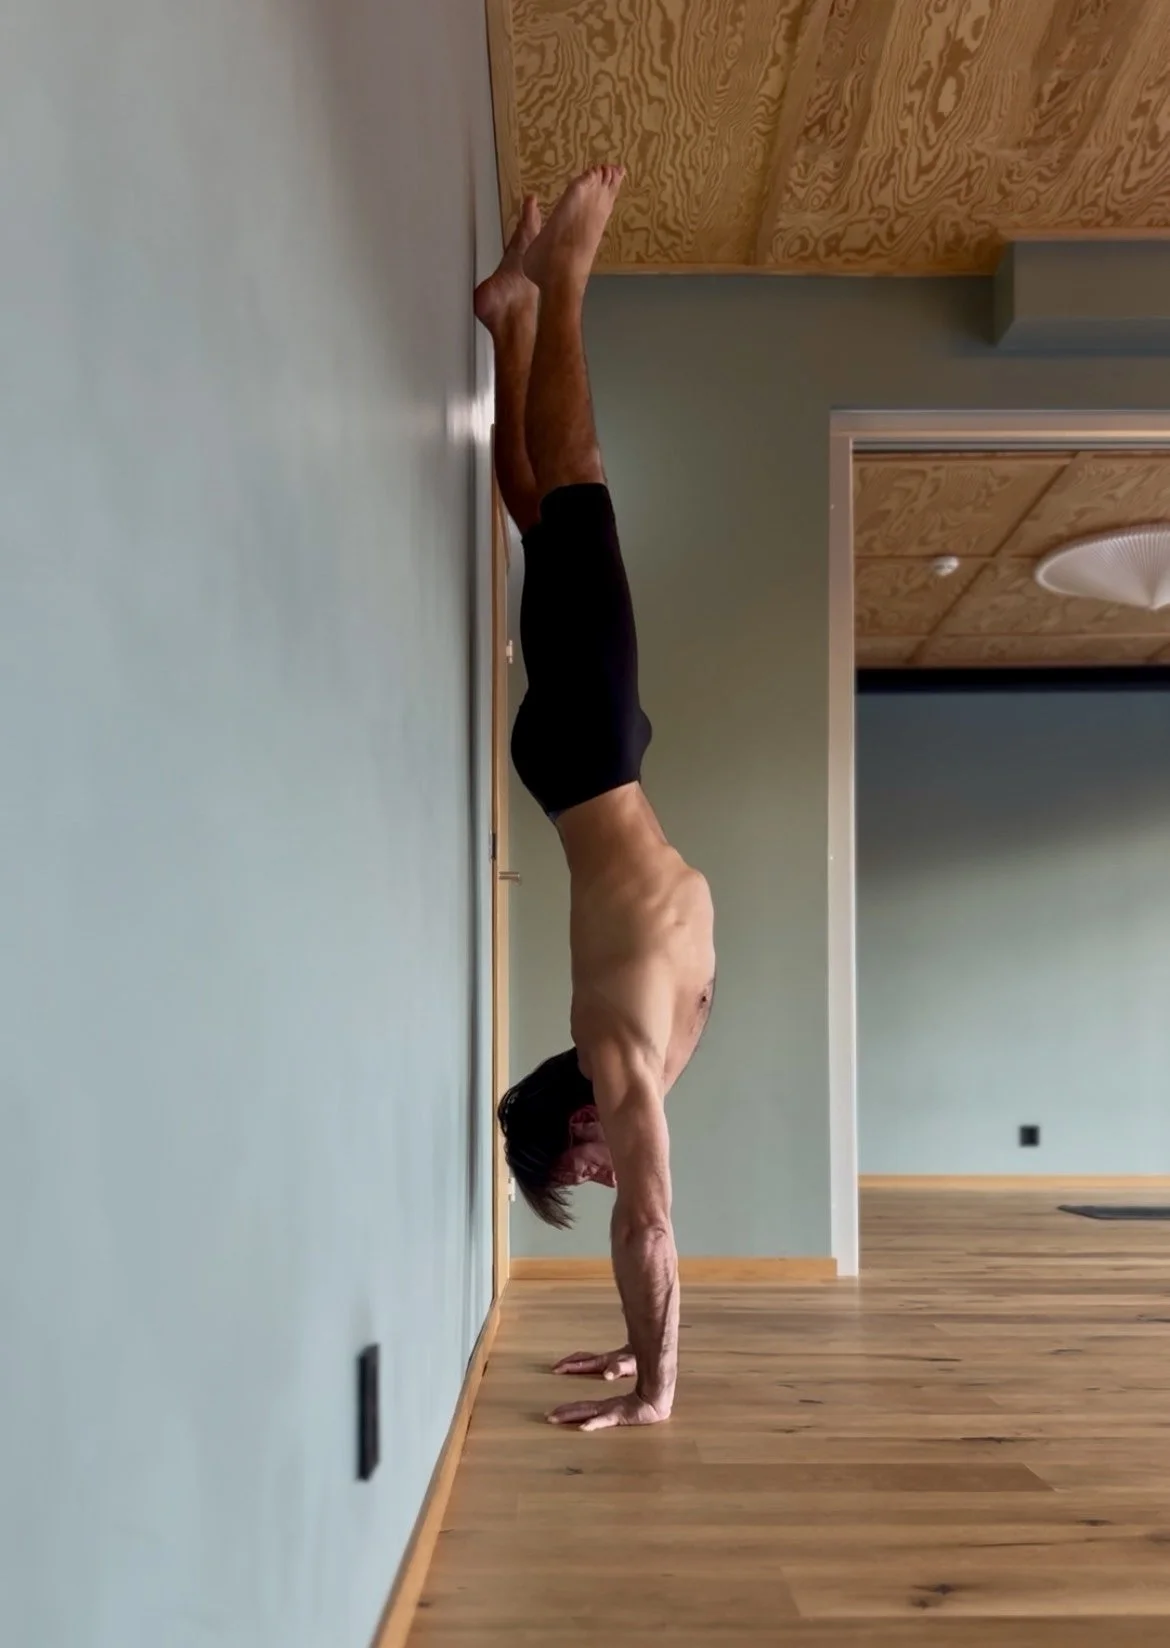
Straight handstand start. Wall taps
As you begin to build some strength you can start playing with tapping the wall with your heel. Don’t move the other leg. Always keep this in line with your body. Tap tap tap.
Eventually you’ll find the control through your hands so you start to bring the legs together. Don’t rush this process. It’s not the most exciting drill to do in the world but it works.
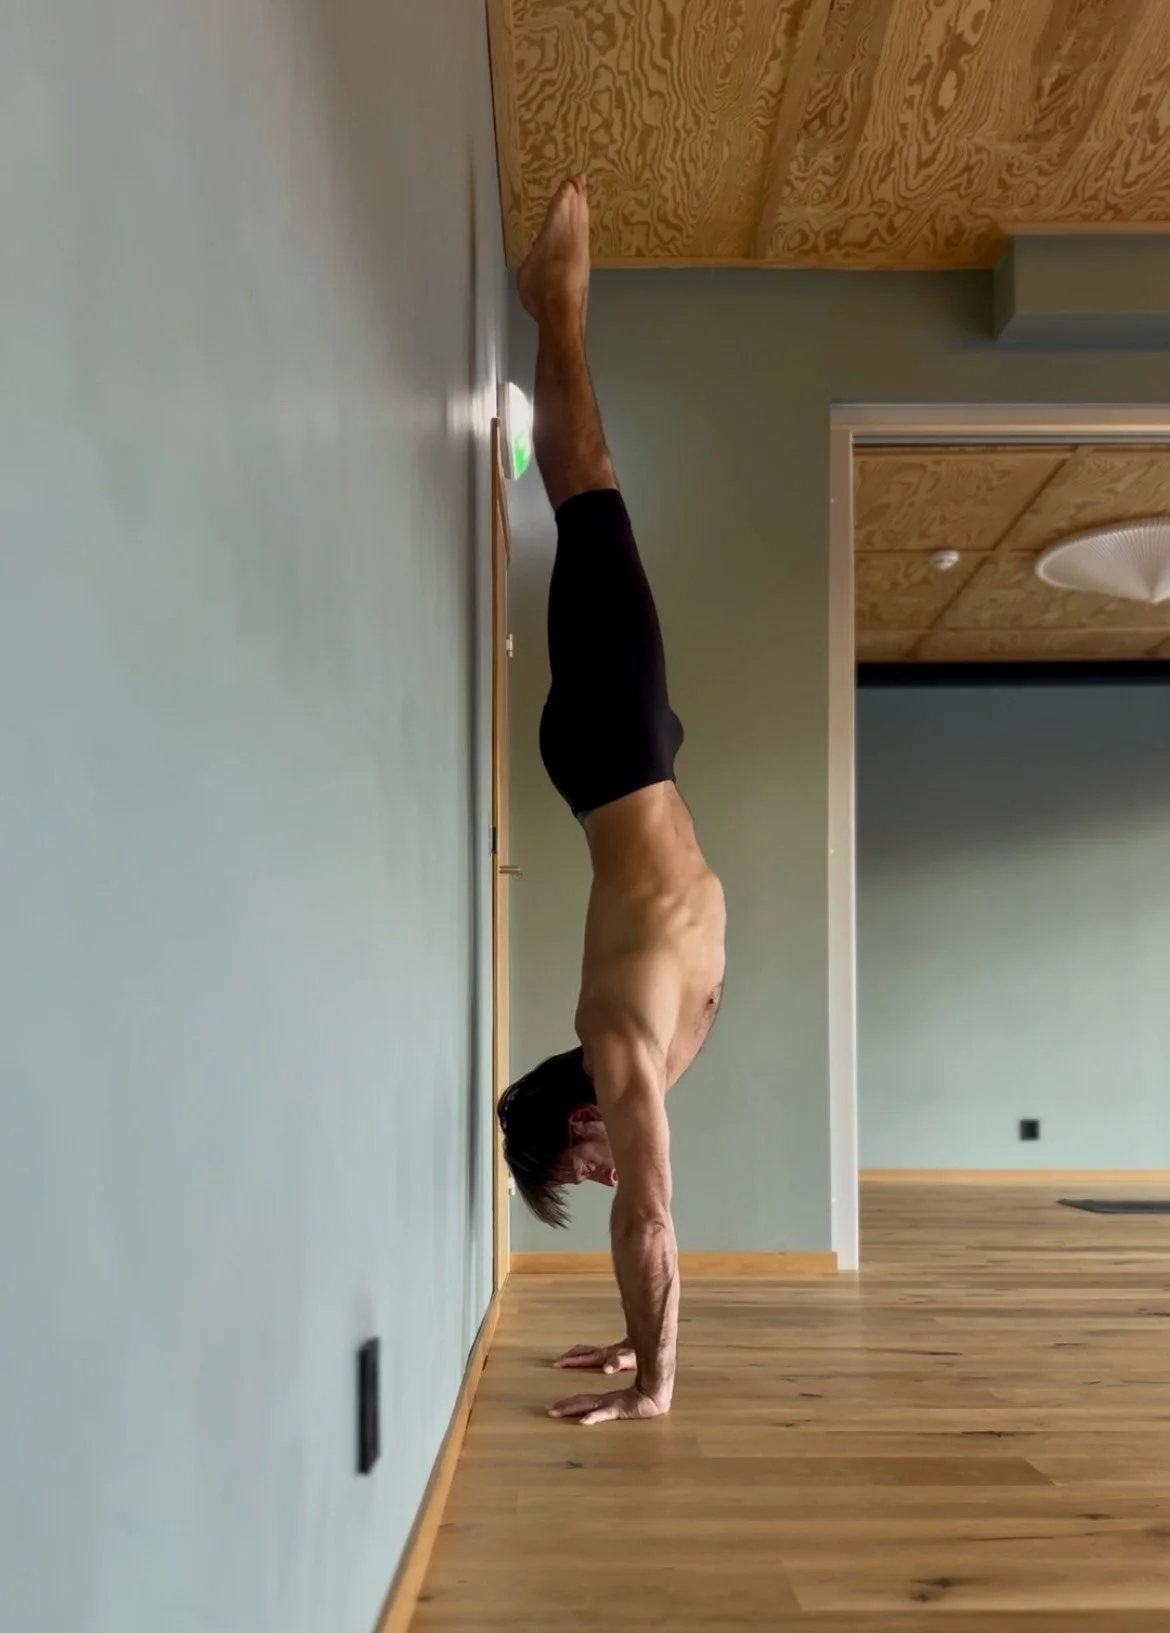
Playing with balance
I recommend to do this 4 to 5 times a week for 5 to 10 minutes if you want to learn to handstand until you can hold a handstand for 10 seconds without touching the wall. When you can do this you can try without the wall. Make sure you warm up your wrists correctly.
Some more info on wrists health here:
I teach handstand workshops to go through the fundamentals and more advanced hand balancing techniques such as pressing here in Oslo, but keep an eye out for an online breakdown that might be coming soon.
Have fun and keep practicing.
If you would like to learn a comprehensive guide on how to handstand check out The Handstand Guide as part of my Online Studio.