
How to Eka Pada Rajakapotasana
In this post I will discuss how to come into this back bend and specifically how to open the shoulder which is essential for this asana to be practiced safely.
This asana requires a large range of shoulder mobility and it is important to open this fully before students attempt to catch their foot.
I have written previous posts on how to back bend safely; opening the hip flexors; and opening the upper back that should guide you nicely in preparing for this back bend.
The psoas needs to be nice and long, as well as the quadriceps and with enough mobility in the back that you aren’t crunching the low back when coming in.
Urdhva Dhanurasana should be very comfortable and ‘easy’ in essence so the shoulders are open and the necessary mobility is in the spine.
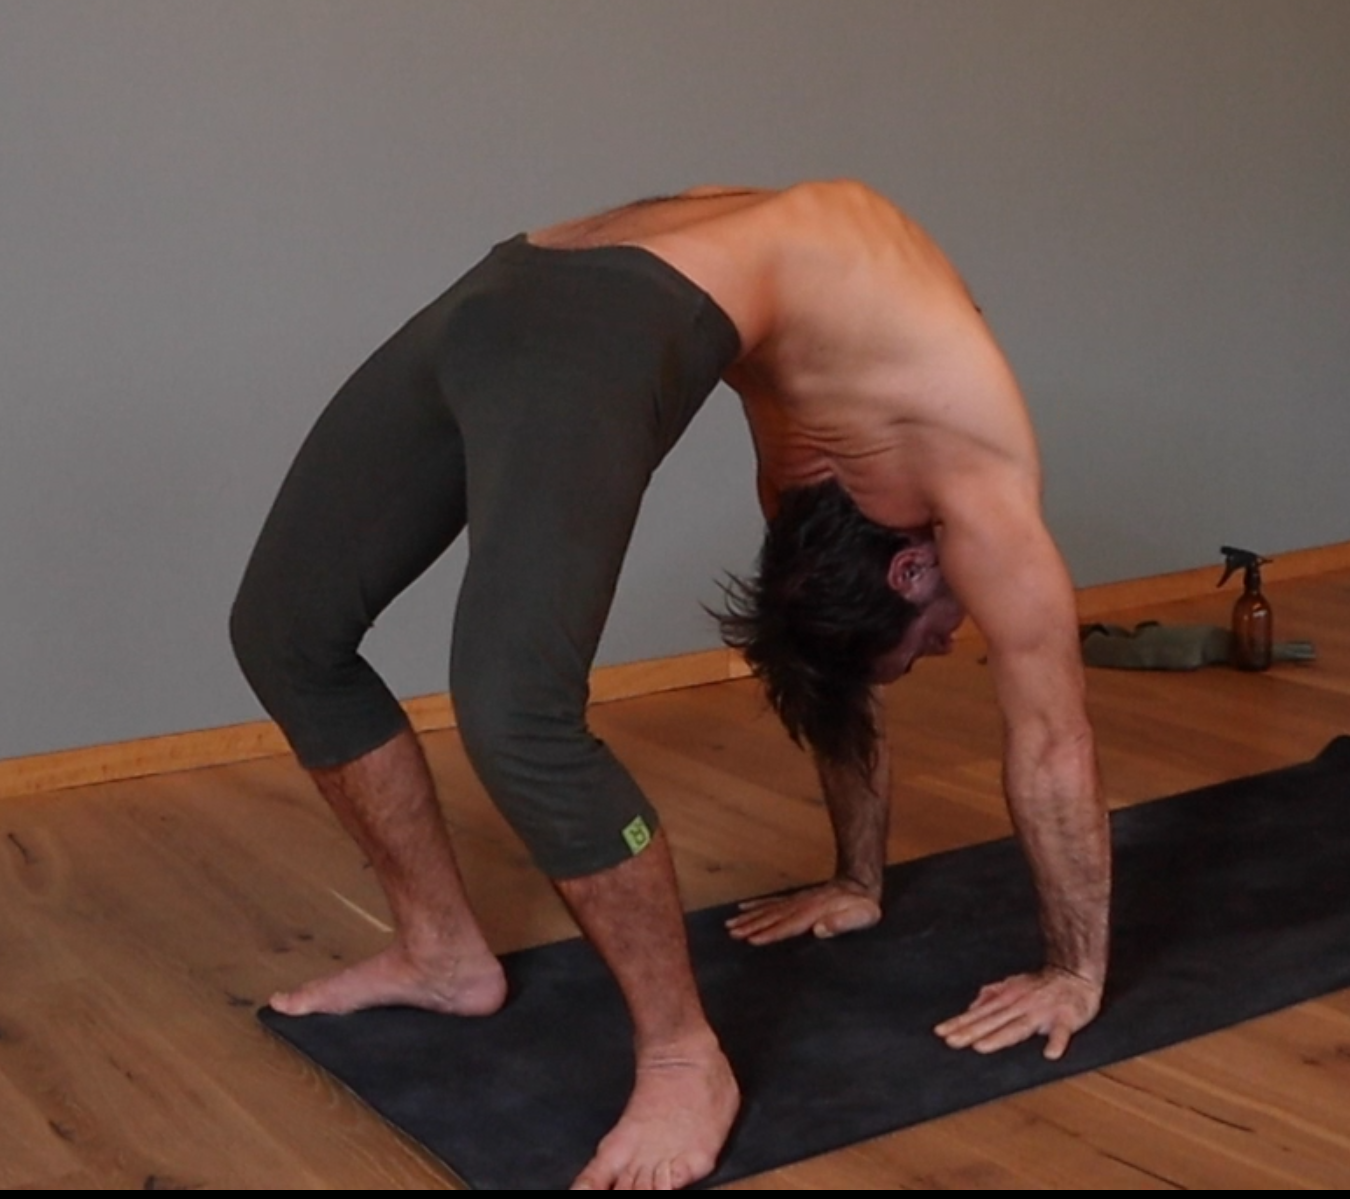
Urdhva Dhanurasana
Along with the necessary openness in the back and shoulders we need a decent amount of hip flexibilty in external rotation so the body is able to support itself on your mat.
Working on Agnistambhasana and other openers will help prepare your hips nicely.
Check out my post on preparing for Eka Pada Sirsisana below for more details:
Let’s look at the shoulder
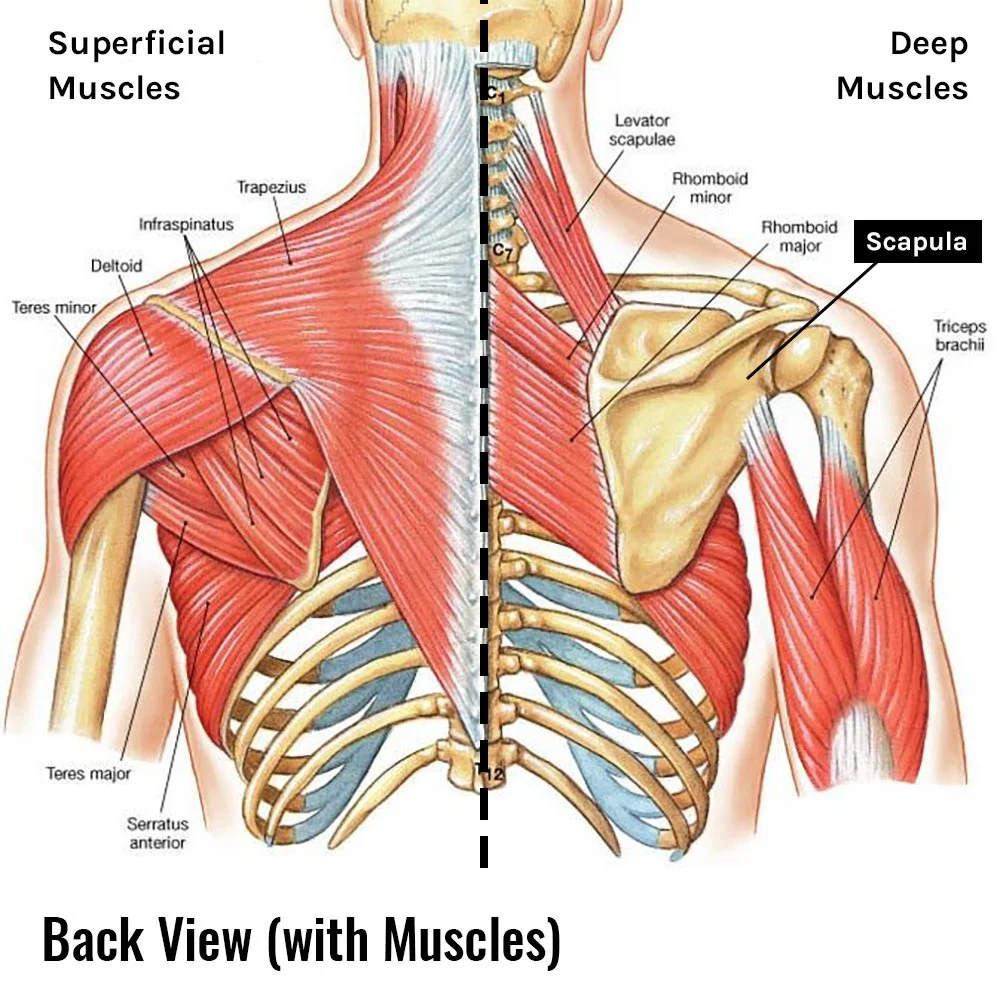
Scaupula and muscles of the back
Now I want you to pay attention to the scapula. The scapula must move through a variety of directions to accommodate the reaching back to grab the foot in this asana and then up and over our head to come into the back bend.
The shoulder moves through extension and a downward rotation depressing the scapula, and then up into flexion and external rotation elevating the scapula.
All of these movements whilst holding on to the foot requires a lot of shoulder mobility to practice safely.
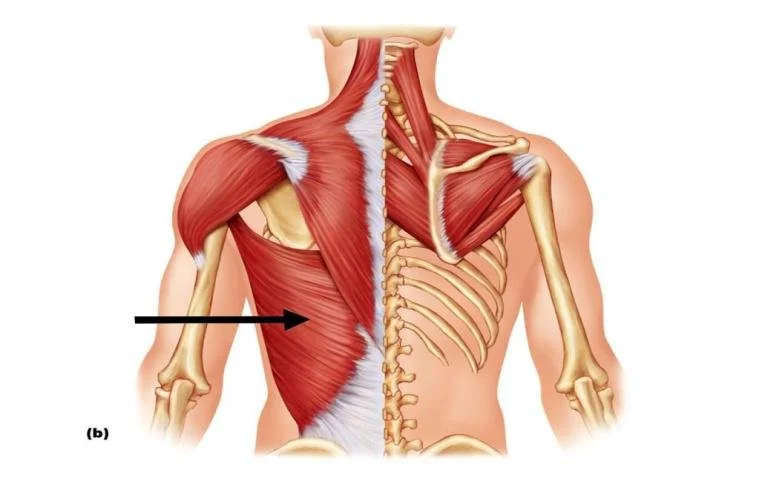
Lats
Also, looking at the image above you will see how the scapula sits underneath the latissimus dorsi muscle (b). This needs to be open ( mobile ) enough so the scapula can slide underneath and not get stuck which is what I often see when practitioner attempt this posture. You can feel the blade of the scapula sliding around this muscle when you practice this asana and the ease at which this happens will define whether you feel pain or not and potentially a restriction.
In my opinion this is the most important aspect of practicing this asana correctly. Obviously as stated above the hips and back need to be open, but it is the necessary shoulder mobility that I often see that restricts students.
In my Online Studio I have created a series of shoulder opening tutorials to help prepare for postures such as this that help find the required mobility to practice these safely.
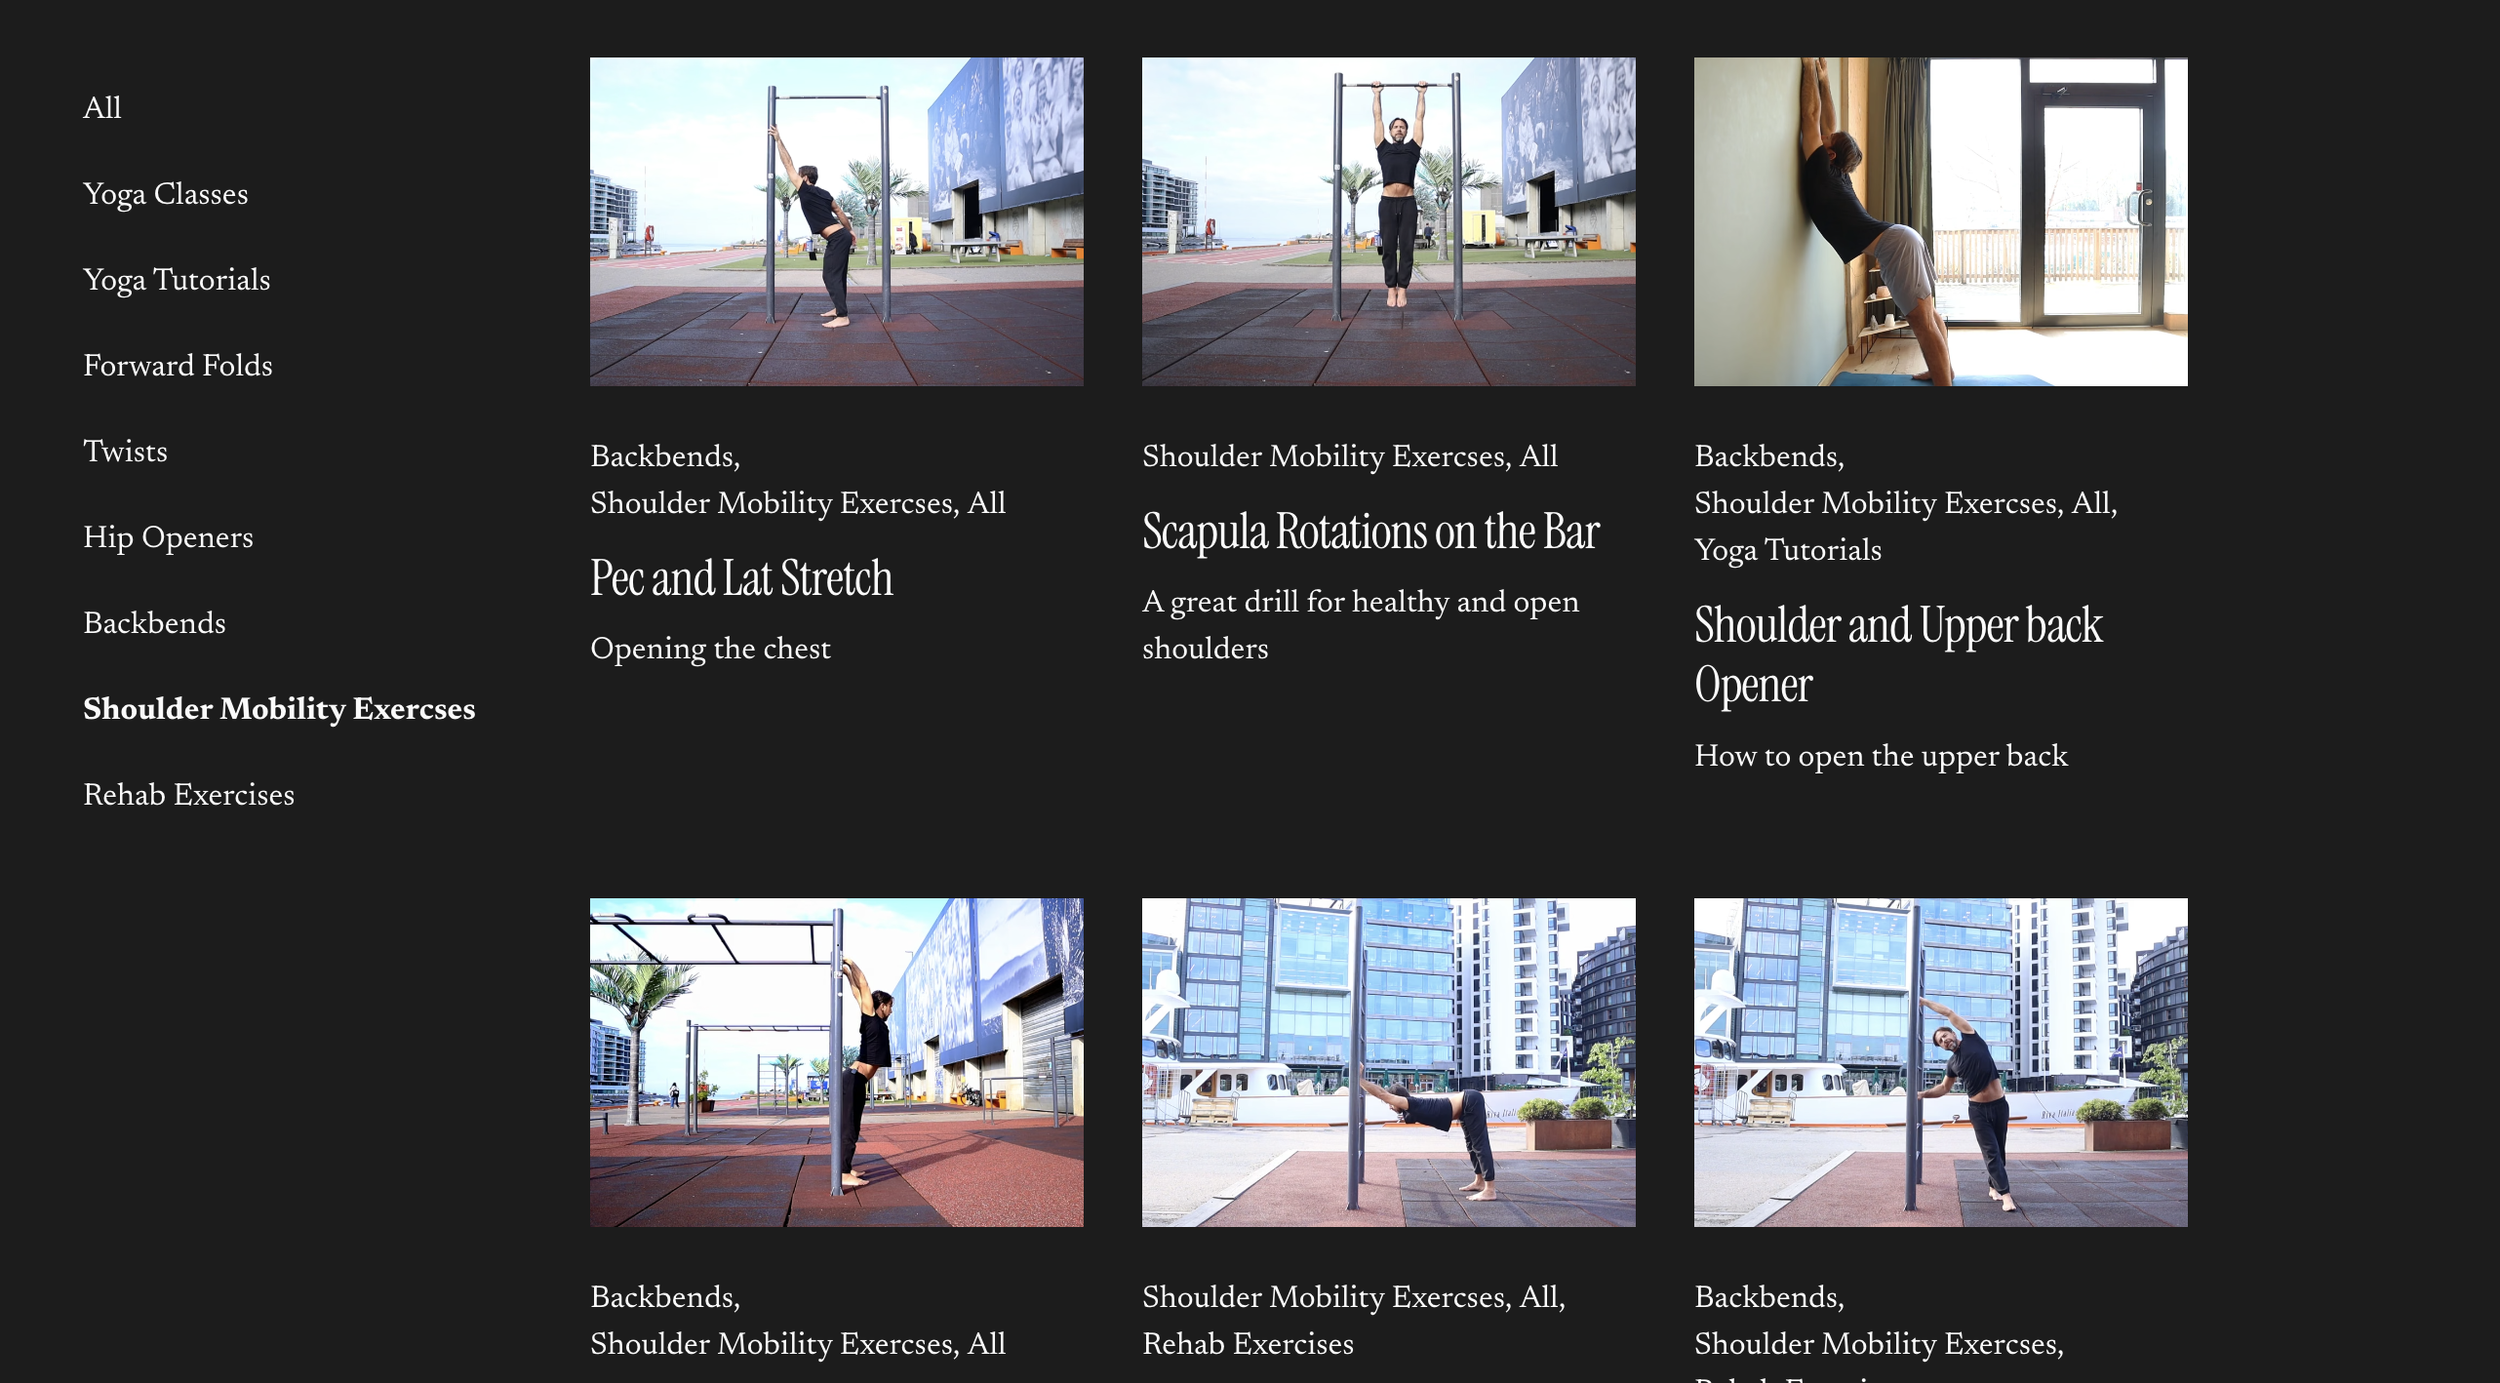
Shoulder mobility tutorials
My library of shoulder work should help prepare your body for the necessary mobility for Eka Pada Rajakapotasana.
Another tip to help release the lats is to use a block as show below to soften the tissue some what and to help release any trigger points in the muscle belly.

Releasing the lats
As the shoulders become more mobile and the scapula begins to move more freely it is possible to attempt to come in and practice.
Coming into ‘pidgeon’ posture we can being to reach back and attempt to hold onto the foot.
Palm up, I hold my toes with my 4 fingers and grip the outer edge of my foot strongly with my thumb. This grip needs to be very firm.

Reaching for the foot in Eka Pada Rajakapotasana
From here I pull the foot towards my upper body and bring my elbow in and begin the rotation of the scapula.

Flip the grip
The ‘flipping of the grip’, keeping a tight grip on the toes as I take my elbow up is where we test the mobility of the shoulder. If you feel a sharp pain or too much discomfort here, back out.

Pigeon with a strap
Practicing with a strap as shown above is a nice stepping stone where you can play with the necessary shoulder mobility but maintaining enough space so you don’t compress the shoulder joint. Adjust the strap length accordingly over time as you increase the range of motion.

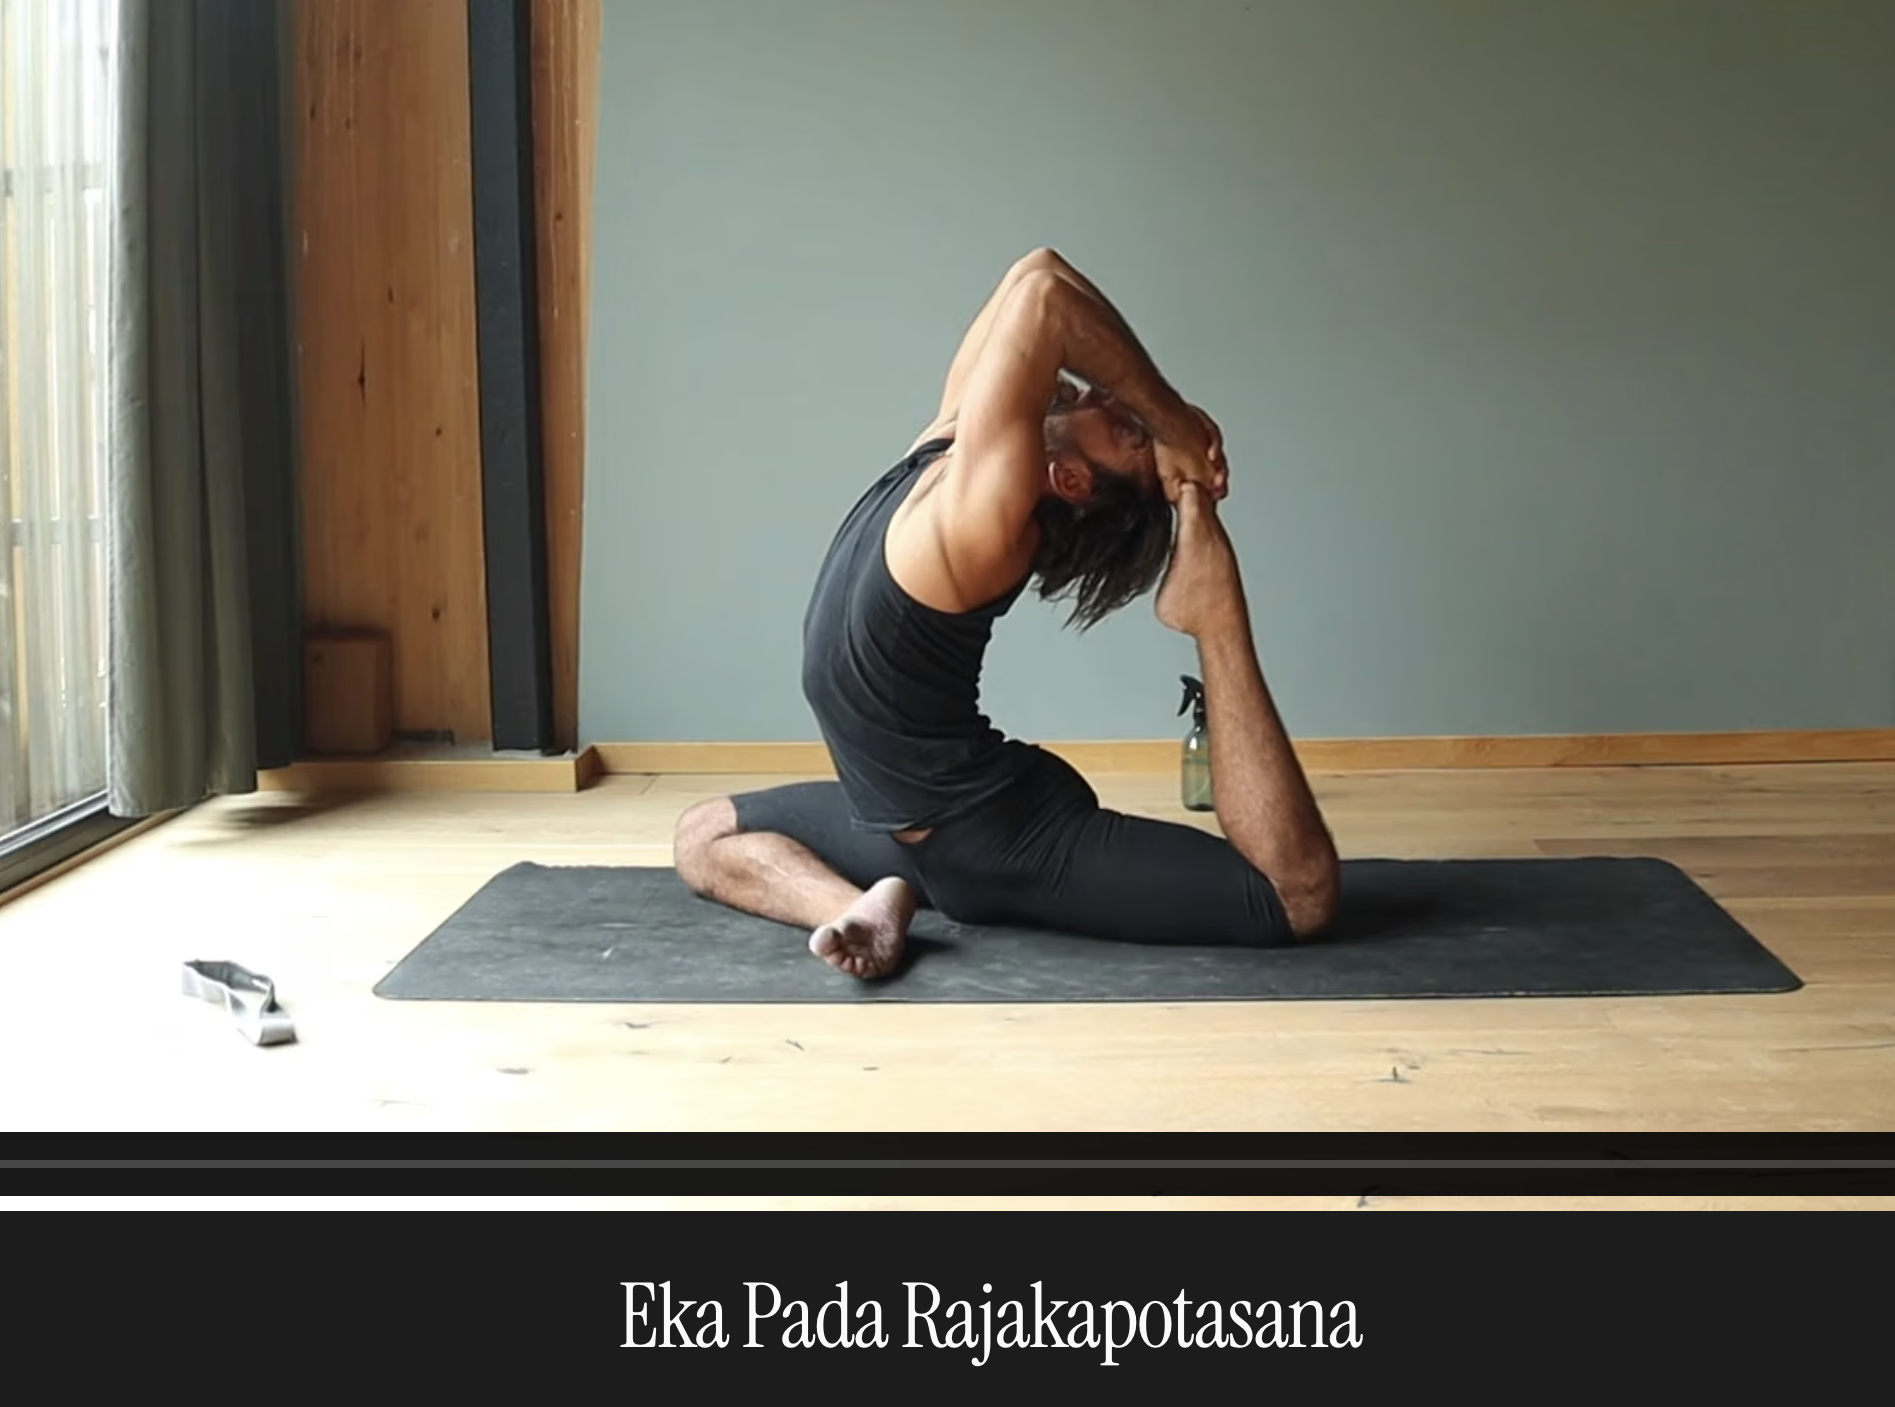
Eka Pada Rajakapotasana
Once the elbow is fully up you can reach back with both hands and complete the posture.
One of the main focuses here is to not dump into the low back. The whole time when you are in this version of the asana you always want to be lifting the rib cage up and forward. There is a lot of work going on in the front of my body pulling the rib cage in and strongly contracting the serratus muscle as the eblows and arm pits squeeze towards each other.
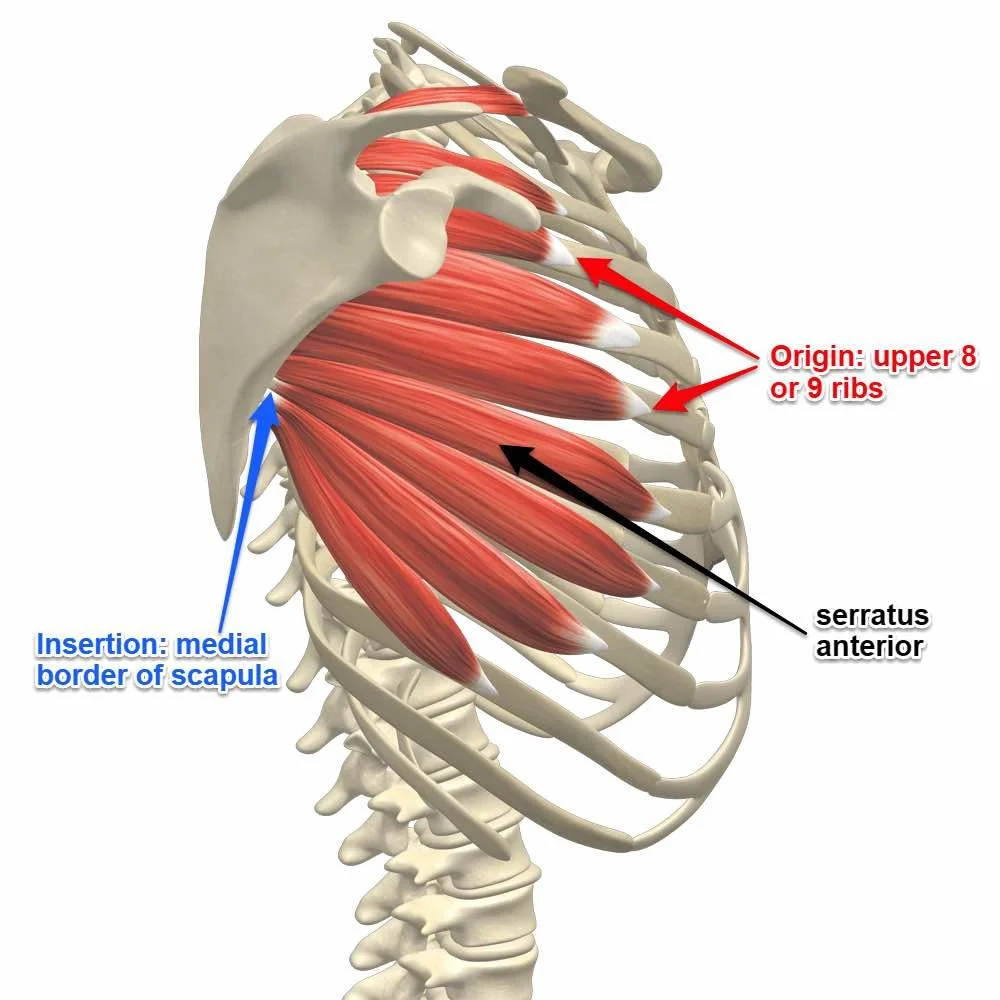
Serratus activation
Also to note, if you are an Ashtanga practitioner, Eka Pada Rajakapotasana interestingly enough comes after Kapotasana. I would say this is because in Kapotasana you work on opening the shoulder symmetrically and creating enough strength in the diaphragm which gives you the support you need to practice deep back bends safely.

Kapotasana
For a full tutorial on how to practice Eka Pada Rajakapotasana, head to The Online Studio and become a member.
Pigeon Tutorial
Get anytime access to the Online Studio. All Yoga Classes, Tutorials and Courses. Monthly live Zoom Q&A and discussion. Cancel Anytime.